Nameboards
Not all projects come out perfect. There is a learning curve to everything on a boat, and given how little experience I bring to so much of the work to be done, it’s remarkable that Defiant still floats. One of those projects that started out with the very best of intentions and ended not-so-gracefully is her transom nameboards.
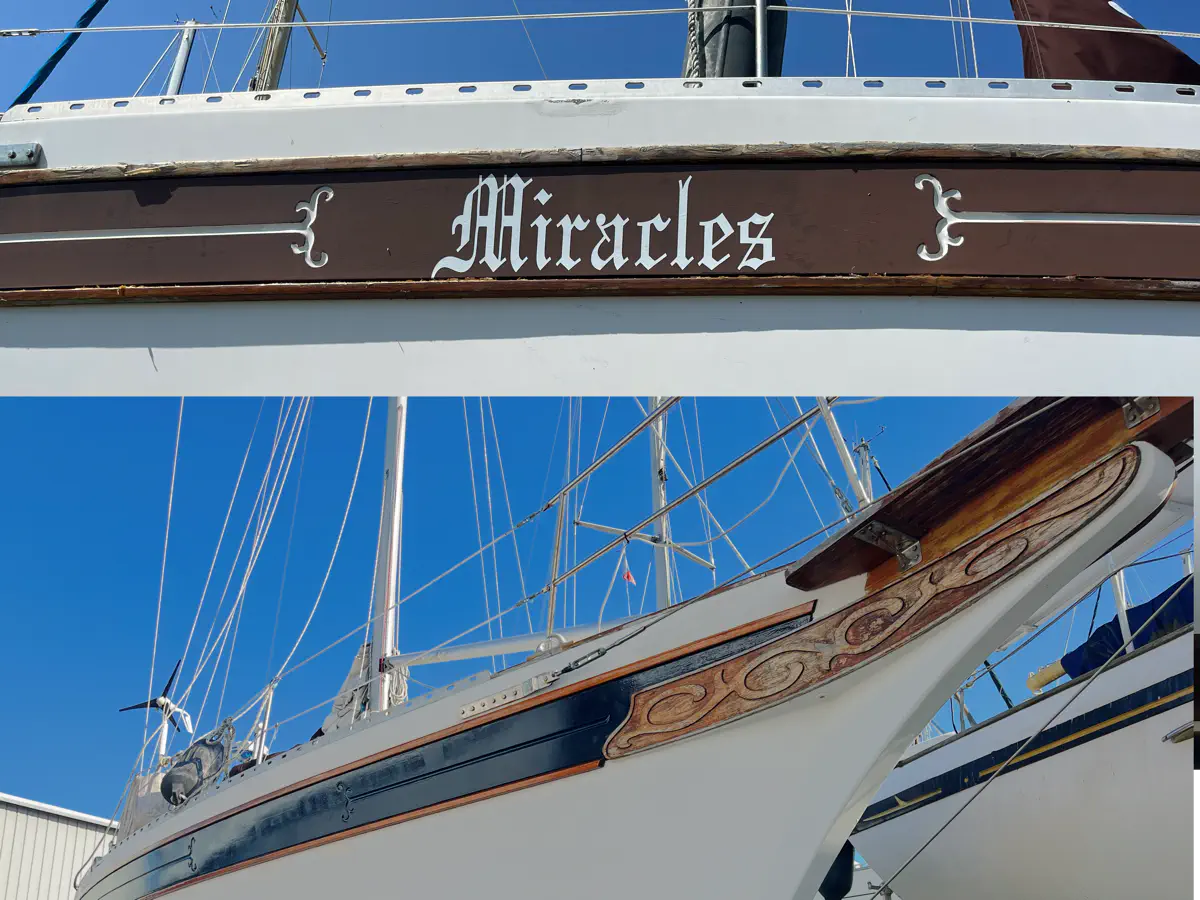
Why did I hunt down a boat with so much teak and such a massively oversized bowsprit? Because I wanted a pirate ship of course. And nothing says pirate ship more than a pair of oversized teak nameboards scrolled across the backside of a wineglass stern. When I first took possession of Defiant her previous name and hailing port were a combination of stick-on letters; they were peeling and faded, but the positioning looked good. I went to work taking careful measurements of where the lettering was currently positioned, then labored for days with a heat gun to remove the old lettering.
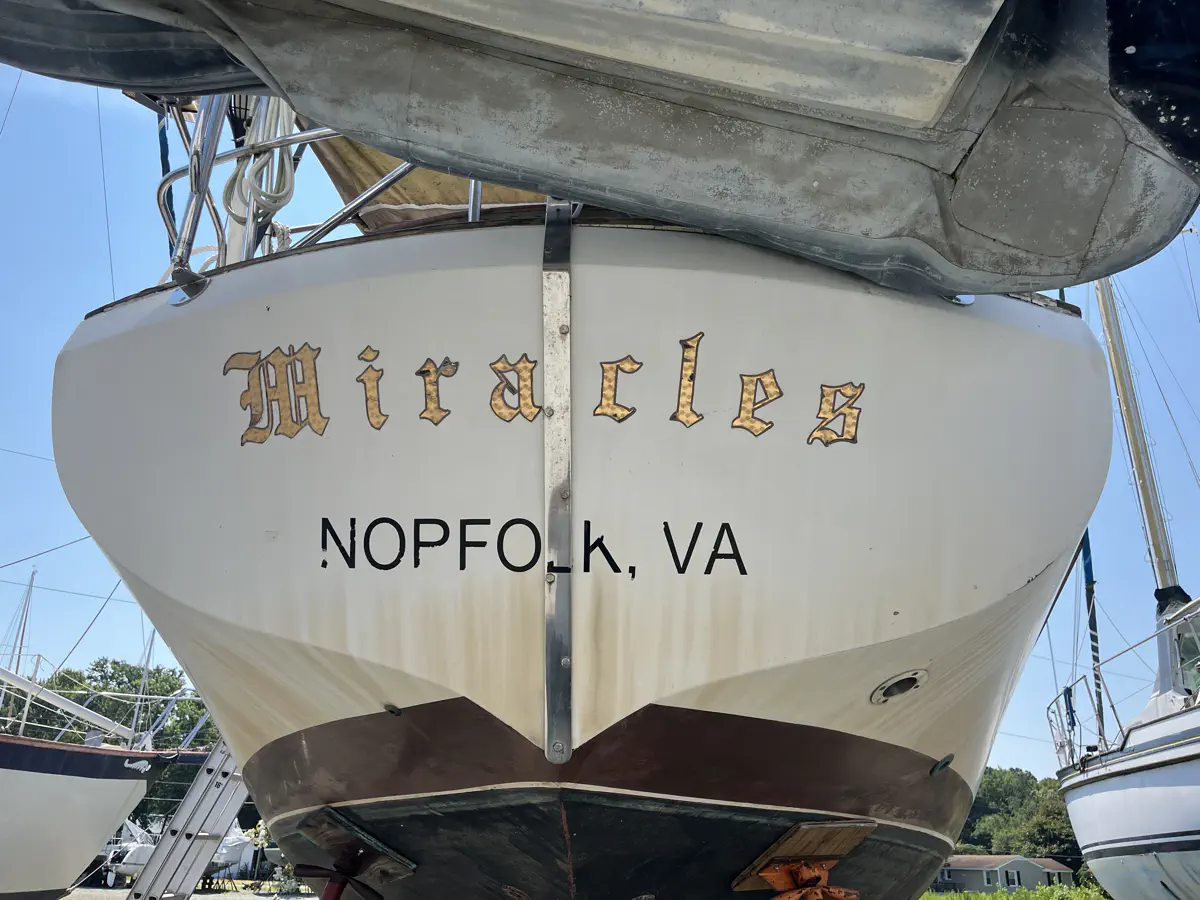
The name was ghosted pretty badly on the transom even after I scrubbed away the tea stains, but every person I talked to assured me that it would quickly fade away in the sun, and it was nothing to worry about (it’s been six months, I’m still waiting for them to fade 😕 ).

In addition to the transom nameboards, Defiant has two nameboard mounts moulded forward near the bow - and so I commissioned all four boards to be made for with her name and hailing port.
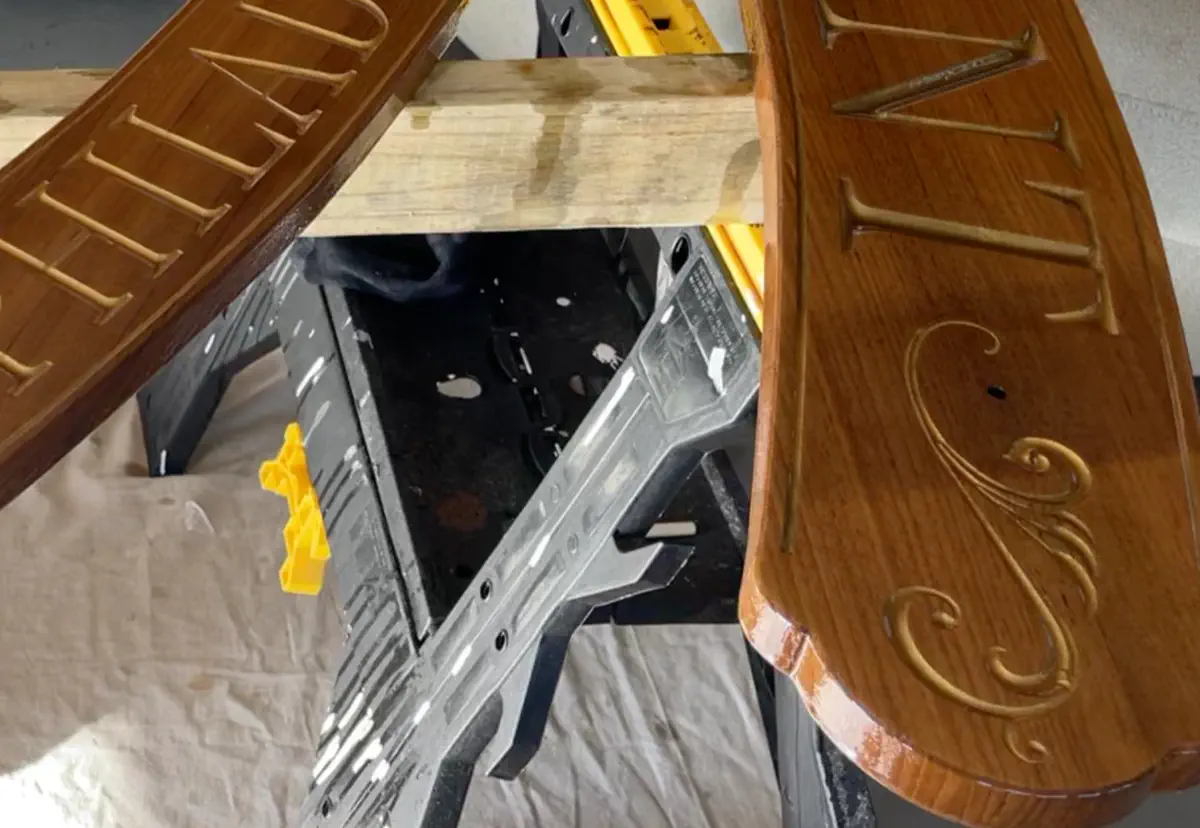
The boards came out magnificently, and I cannot say enough how happy I was with the work from Kilmarnock Lettering Co. in Northern Neck Virginia. Look at these things.
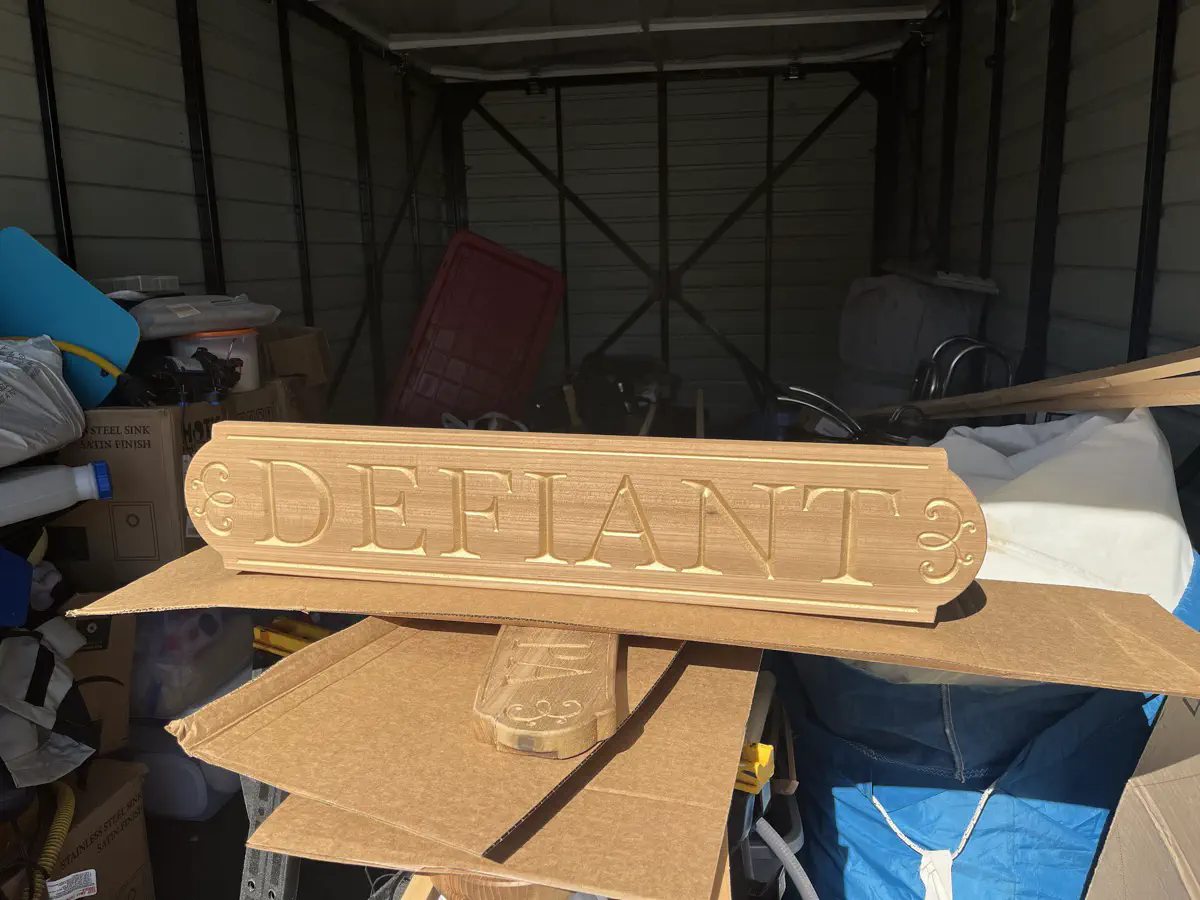
They were obscenely expensive - cost more than the car I picked them up in - but I had committed to making Defiant into the ship I wanted her to be, and I wasn’t going to put more stickers on her.
The first step to installing the nameboards on the transom was very, very carefully measuring the location of the backstay chainplate so we could route a channel into the center of the boards. I did this repeatedly, and then enlisted the help of a friend who is far more skilled with a router than I to make sure the cuts were perfect. They were! And both boards snapped on like lego pieces, with the chainplate running exactly center to them both.
This Is Where I Start To Screw Things Up
Unfortunately, the backstay actually sits at a pretty dramatic angle across the transom (I never noticed it before, and now I can’t not see it). That angle meant both boards were now sitting almost 2” lower on the port side, good and lopsided. But fuck it, they align with something, and I figured as long as a kept the boat tacked hard to starboard they would look perfectly level.
So on to the next challenge, curving the boards to follow the transom. Defiant isn’t exactly a double-ender, but her tail does have a good bit of bend. I watched videos and read woodworking posts, asked the robots, and it seemed to me that even with these 1” thick slabs of teak, I should be able to bend them if I was slow and deliberate about it.
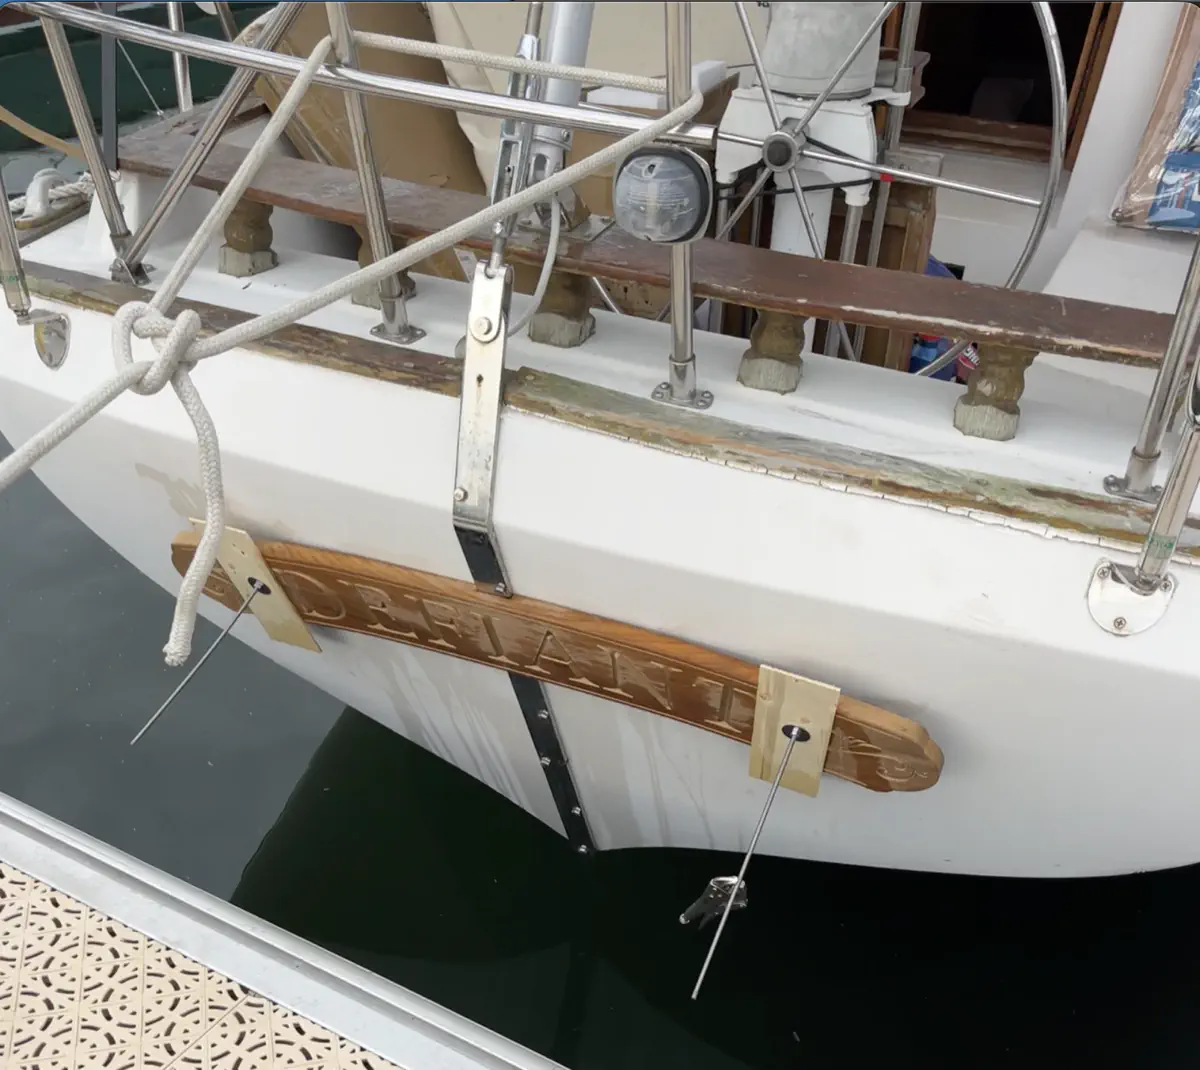
I aligned the boards, drilled holes in each end of them when the bolts would eventually live, and passed several feet of ¼” allthread through each hole until they marked the transom. Then I drilled the transom appropriately, fed the allthread into the aft lazarette, where I secured the end with a fender washer and a nut. On the board side, I placed a thin sheet of scrap wood 4” wide between the washer and the nameboard for protection. Then I began to tighten, alternating side to side. The board initially flexed quite a bit, leaving only about a 2” gap on either side when the nuts were wound tight. Per the instructions I had found I poured buckets of near-boiling water on the nameboards, and sure enough they would then take a few more turns.
I did this several times a day, every day, for two weeks. Boil water, pour on board, turn a few turns, repeat. The boards did gain a bit of curve and were honestly less than an inch away from the transom, when the allthread snapped in half on the top nameboard. Within minutes the board was nearly flat; this wasn’t going to work.
I Admit More Defeat
OK, they aren’t straight, and I can’t get them to bend enough to fit the transom. Fine, I thought, I can put blocks between the board back and the transom and they will stand out, and maybe that will look even more pirate-like? Sure. So I cut teak spacers, soft fit it all up, and pulled the boards off to varnish. One of the scrap wood spacers left a shadow across the board, so I let it rest several days until the shadow disappeared. On went the first coat of Epifanes, and when it dried, that shadow had not only returned but become a full-fledged tattoo.
Cooler heads than mine suggested that I sand the first coat off, bring it down until all signs of tattoo are gone, and try again. So I did. This time there was not a trace, the wood was identical across the board. Then a new coat of epifanes and it looked perfect. Great! Two more coats, and suddenly the tattoo was back.
At this point I was committed; name boards are essential for coast guard registered vessels, so even if they weren’t perfect they needed to be done. Nine more coats of epifanes went on, slowly, as the winter cold pushed the drying time into several days per coat. I was nearing the end of the varnish when I noticed another twist: as the varnish was hardening, the gold leaf was becoming harder and harder to see.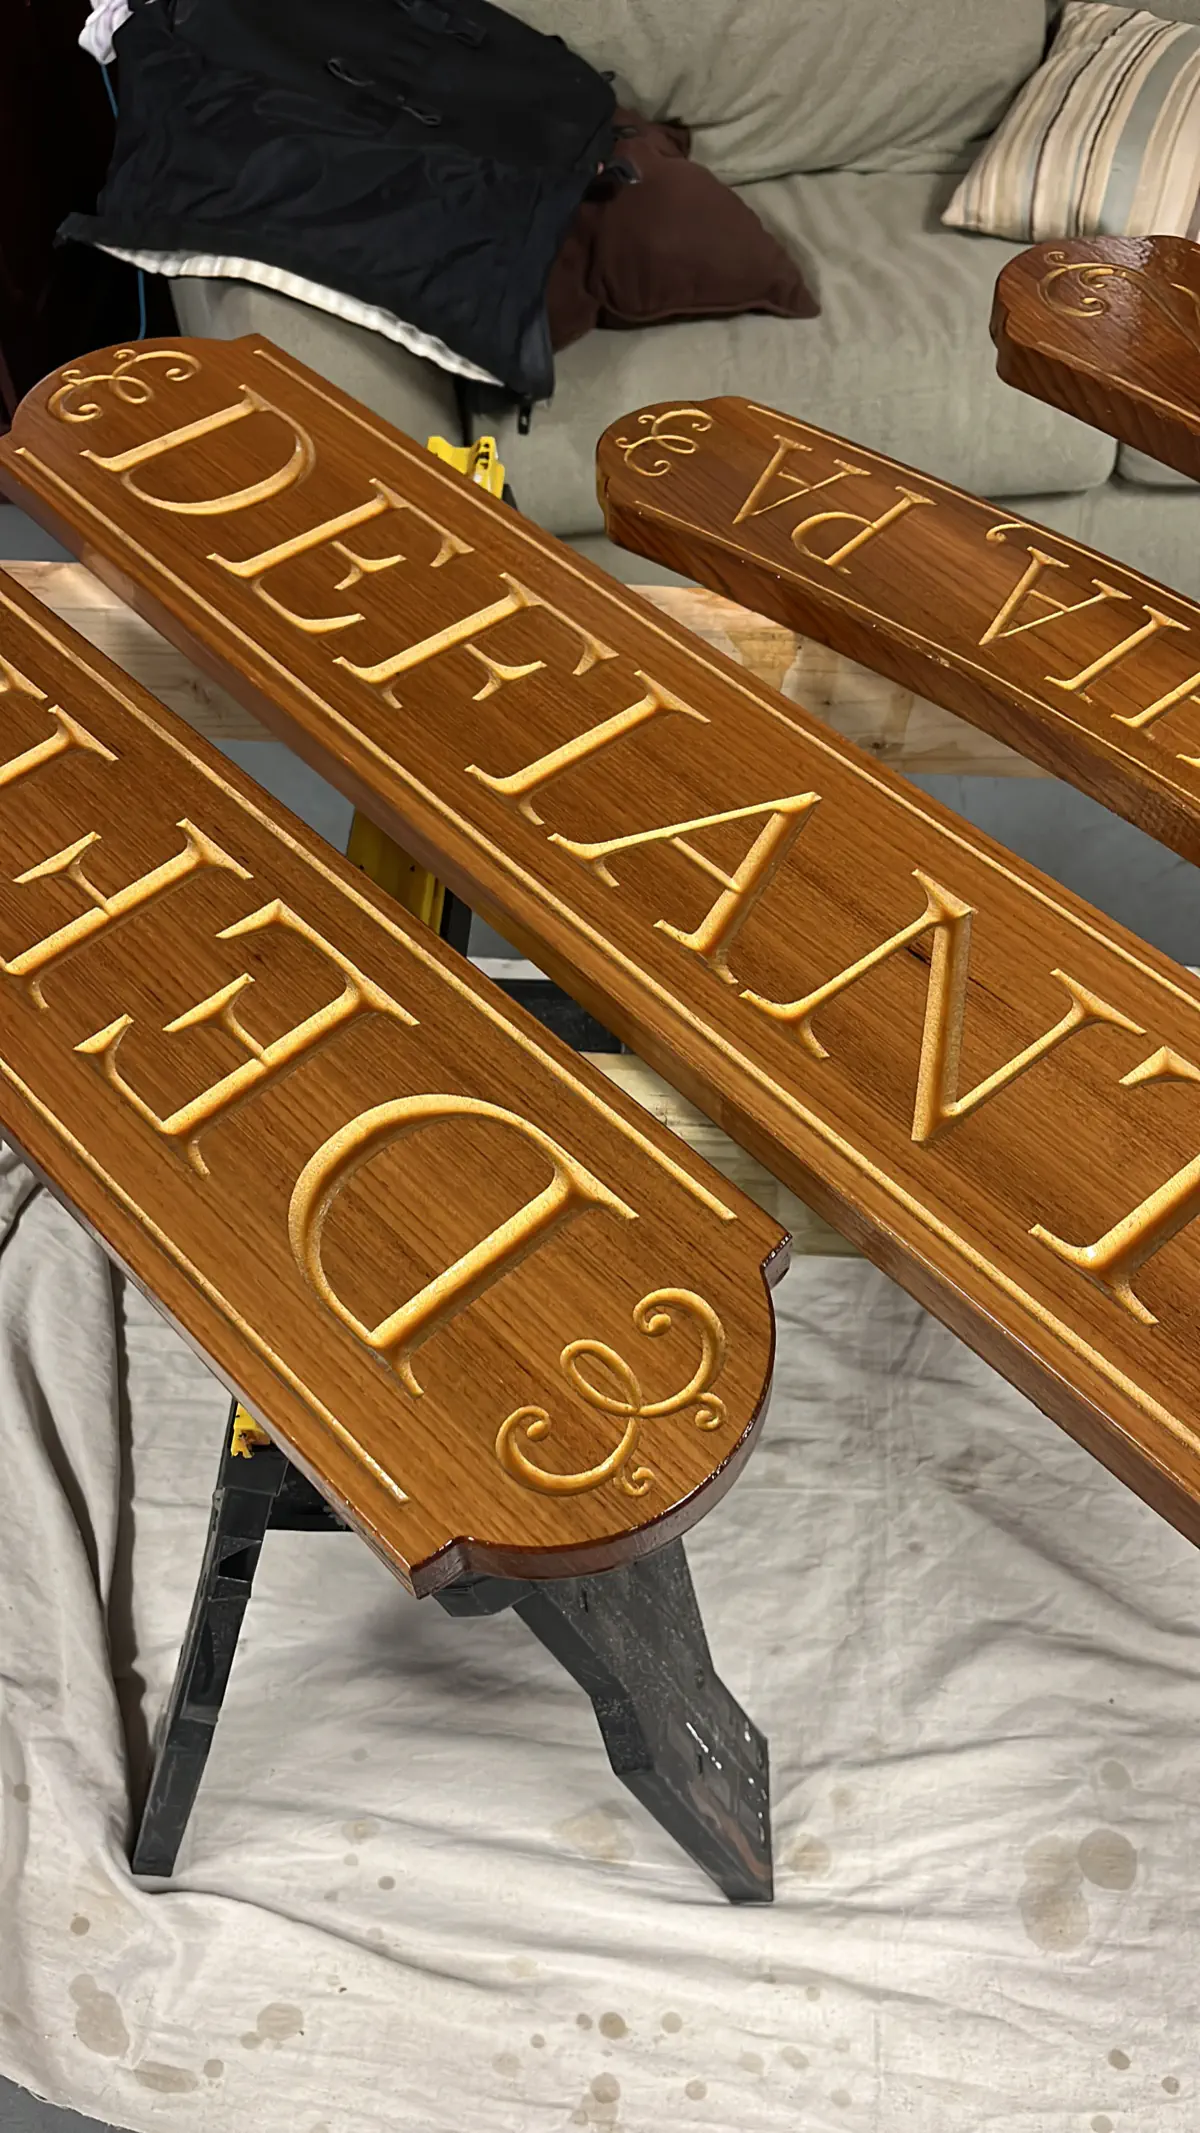
The Hits Keep On Coming
Now the varnish had settled into that deep, rich gold teak color, and too much of the varnish had been allowed to pool inside the letter carvings. The resulting thicker varnish took on an opaque brown, essentially blocking the gold leaf from view completely. The result is a name board where it is frustratingly difficult to read the name in bright sun (which is a nameboard’s only job really). Goddammit.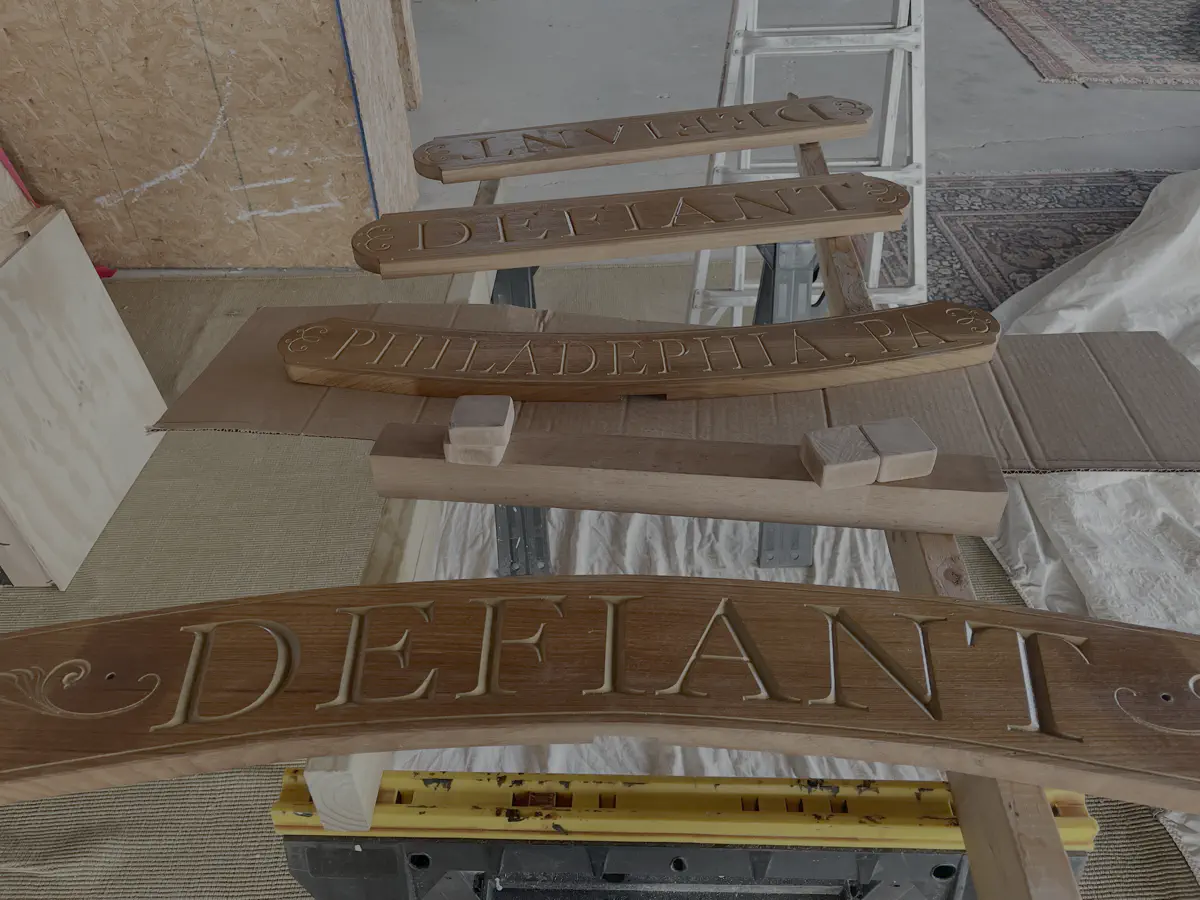
Salvaging A Little
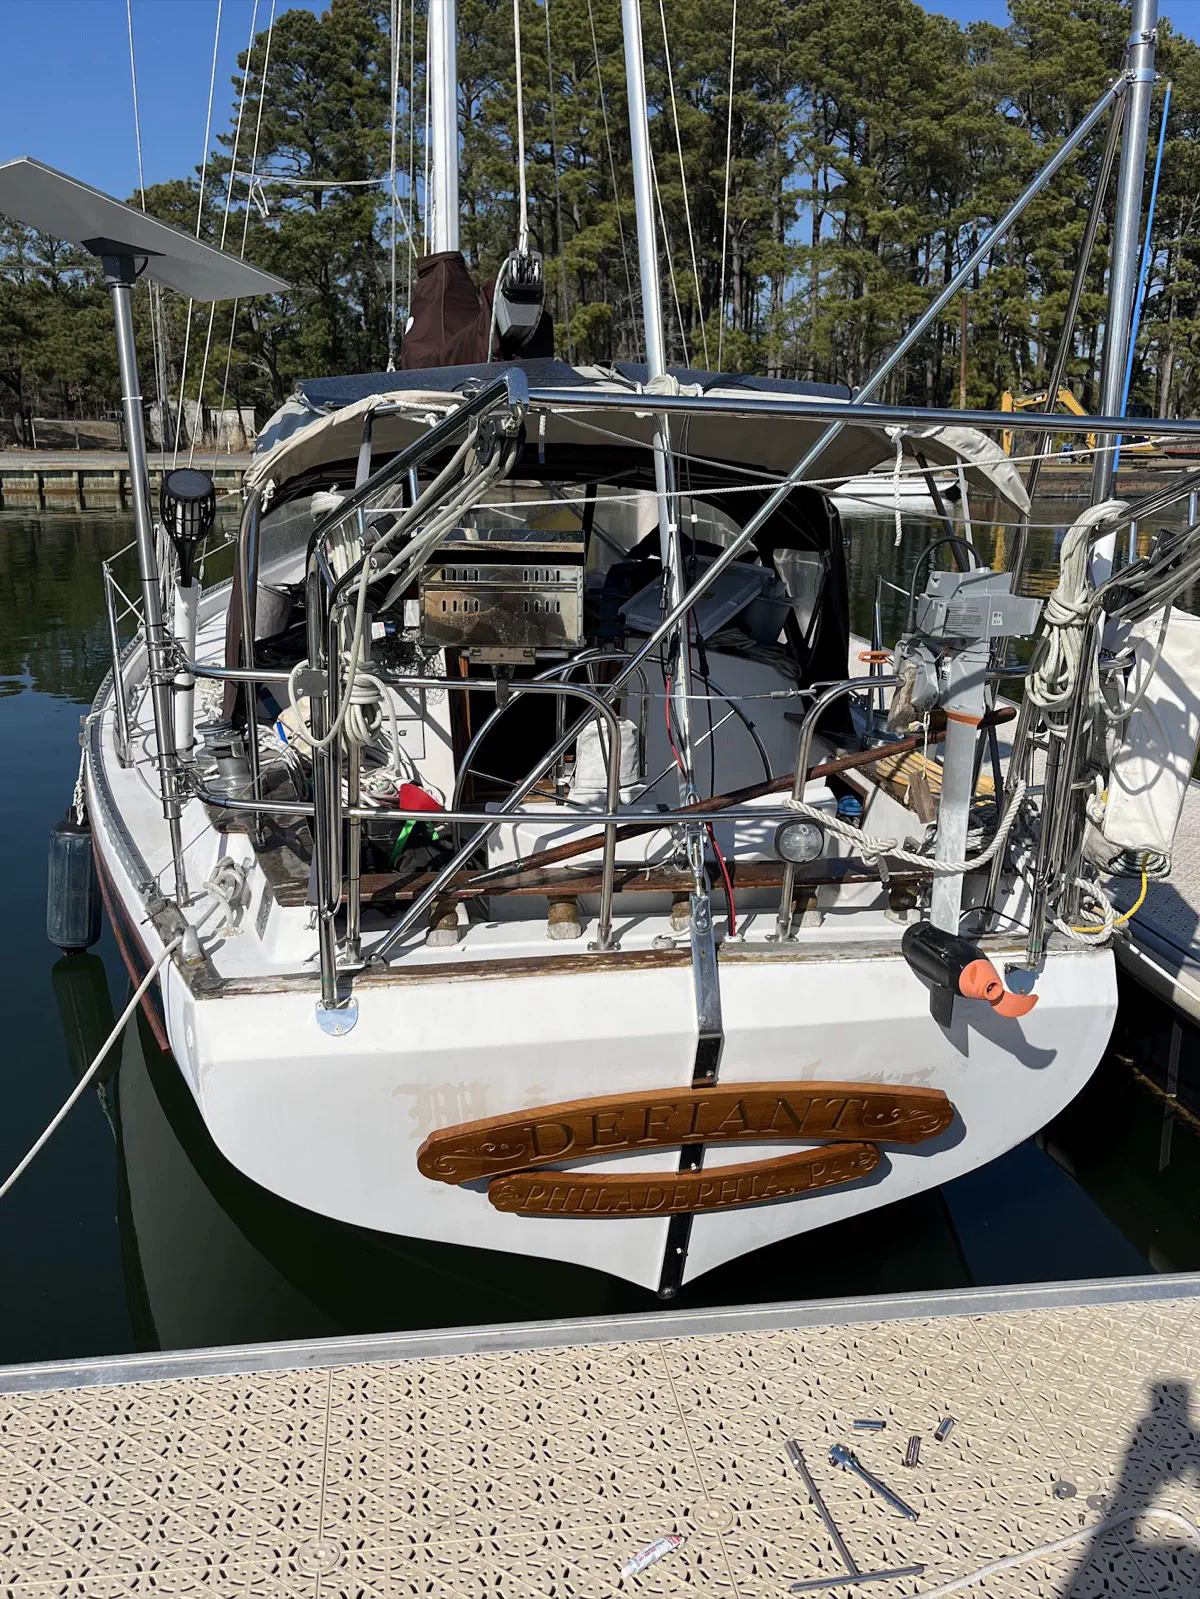
Since the boards were no longer going to sit flush on the transom, this gave me several inches of room to adjust how the spacers would place them - and, in effect, correct the skew so at least the boards would now be level. I took the router to them myself this time. No longer aiming for perfection and instead settling for completion, I carved an additional ¼” of groove on either side for the chainplate to float inside. This groove, combined with the newly positioned spacers, actually worked! My nameboards were level with the back of the boat. I epoxied the newly cut channels and mounted up both of the boards, recessing the boltheads enough to fit in bung plugs in all four mount points. Surprisingly, everything went exactly as planned. The boards were on, Defiant was legal and more of a pirate ship than she had ever been!
One Last Kick In The Junk
I stepped back to admire my handiwork, and immediately noticed something was off. Very off.
When I had measured from the original name and hailing port, I failed to take into account that those were thin, tiny stickers. These nameboards are giant blocks of wood. The visual space was gone, the name way too far down and the hailing port way too far up. My beautiful nameboards were mounted, alright - and they looked like a sideways vagina.
The Silver Lining
So that’s how things will stay for the foreseeable future; Defiant will set sail with a lopsided, curveless, difficult-to-read sideways vagina on her backside. And that’s OK. If there is one thing the last year has taught me it’s that everything on a sailboat has, at best, a two year lifespan - good or bad, it won’t be long before a thing needs to be sanded, painted, glassed, rewired, reworked, or otherwise refreshed. Saltwater and sun are brutal on everything - which means the state of everything aboard is forever temporary. Defiant is badly in need of topside paint, so I will get a chance to try to mount the plates again very soon. In another season it will be time to varnish again, the next time with lessons already learned.